Karl Deutsch Wall Thickness Gauge Echometer 1077 Data
Highest precision for ultrasonic wall thickness measurement.
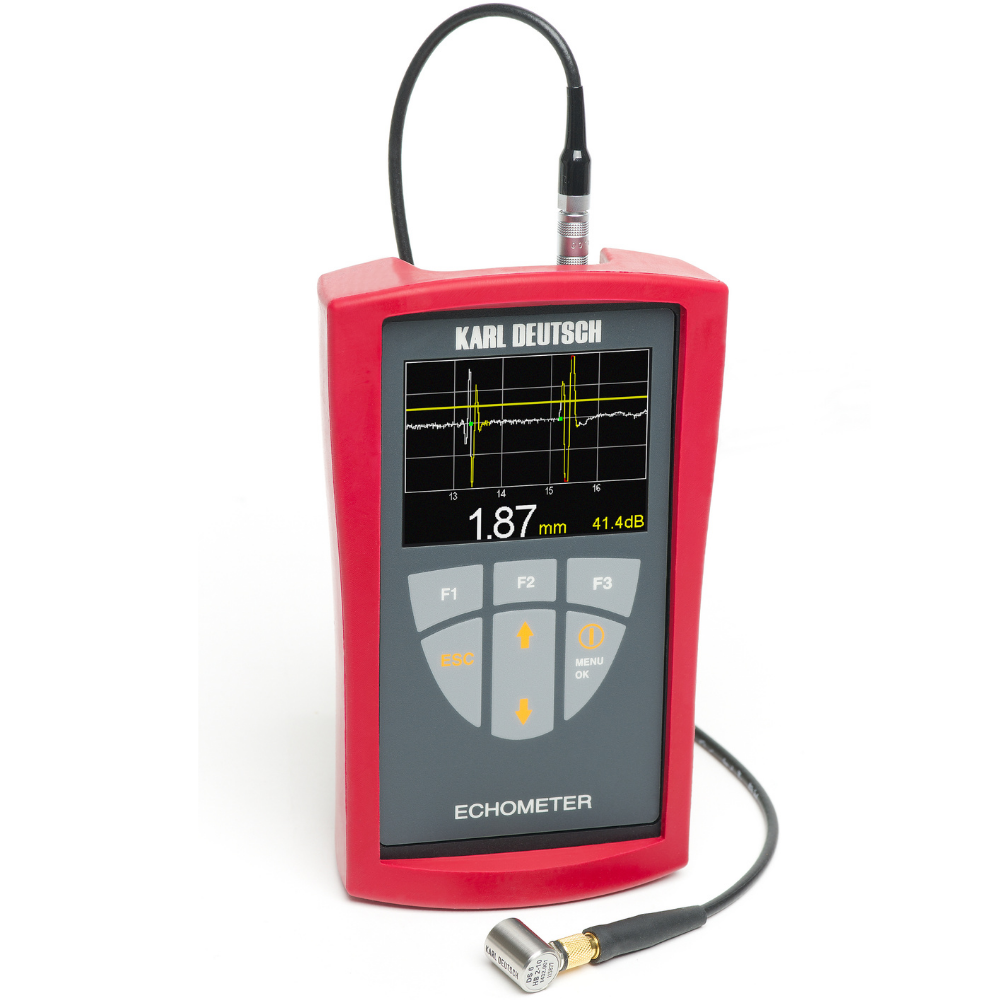
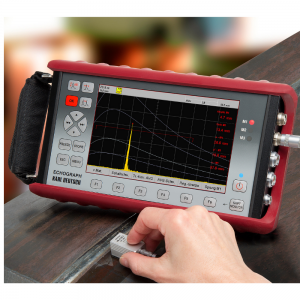
The new A-scan ECHOMETER 1077 comes with individual gate selection and measurement at zero crossing of the signal to ensure highly precise measured values with a measurement uncertainty of up to 0.01 mm, e.g. to meet the requirements of precision tube manufacturing or car body pressing. The measurements can be executed based on the multiple echo principle; as well single element transducers with or without delay line may be employed.
Probes
The instrument uses single and dual element probes. Single element probes may be used with or without delay line.
Besides probes from the KARL DEUTSCH scope of delivery it is possible, in most cases, to use probes already available with the customer. Physical precondition for this is a broadband frequency response to generate clearly defined short pulse and echo signals.
In contradiction to conventionally designed gauges the A-scan and the measuring points contained therein can be used to judge especially well whether the probe is suitable for the given measurement task.
Measurement also on coated and multi-layer substrate
Quite often in materials testing, the specimens to be examined are protected by a varnish or plastics coating against environmental impact. Other materials in turn comprise several layers and the thickness to be measured pertains only to one of the different layers.
The ECHOMETER 1077 is able to measure most accurately through coated material and with multi-layer substrates, too:
By means of the BW-BW measuring method the measurement exclusively determines the transit time of successive back wall echoes or echoes generated by separating layers. This permits the determination of wall thickness also through coatings or separating layers providing high accuracy. Usually this only requires echoes of sufficient height at the separating transition zones.
Possible coating thickness:
A varnish or plastics layer thickness may have a thickness of up to 4 mm. However, in real life coatings of up to 8 mm thickness often do not pose a problem (depending on material).
Operating menu and indication of measuring results
The convenient menu guidance is selectable from many languages, is very user-friendly and appears in comprehensible plain language. Therefore the measuring parameters can be adjusted and modified very simply.
Understandable and plausible symbols inform on the current operating status.
In display mode “Measuring Result Only” three function keys with freely assignable menu topics are available.
Freely nameable folders and files assist with data storage, just as you are used to on a PC.
The readings are displayed in large and clear digits, optionally together with the current statistics data.
A backlight illumination of the display ensures a convenient operation also in poor light conditions.
Features
- Square signal transmitter with a pulse with adapted to the probe for high resolution and energy
- On calibration: determination of probe properties (like centre frequency and frequency range) and automatic selection of measuring range
- Automatic set-up for every suitable single element probe
- For special applications and probes with a high-temperature delay line are available
- Selectable: automatic gain adjustment and – uniquely world wide – compensation of the material damping by automatic depth correction
- Delivery in a handy carrying case
- Configuration management for quick activation of stored settings of standard probes
- Customized settings can be stored with alphanumerical naming
- Statistical evaluation:
- Minimum and maximum values
- Mean value
- Standard deviation
- Limit monitoring
- Individual storing of calibration in single files
- Output of readings via the PC interface for use in own applications
- Robust and sturdy: shock absorbing rubber protective holster with stand
- Splash-proof housing ( IP 54 )
Highlights
Automatic probe recognition
When the unit is switched on or in case of probe change the data of the probe including its frequency spectrum become determined. This permits automatic selection of the probe parameters.
The A-scan display shows the echo curve
The high-resolution A-scan of the ultrasound signal is especially useful with material that is difficult to measure in terms of sound properties, so to optimize measuring parameters, such as measuring range and evaluation of the signal polarity.
Travel time controls gain
Besides manual and automatic gain adjustment you may select a time-dependent gain correction to compensate for the signal damping of the (up to four) first echoes so they show at the same screen height. This ensures that more well evaluable multiple echoes are available without signal clipping, especially with materials of high signal damping.
High measuring rate
The high measuring rate of up to 100 Hz ensures detection also of small defects when dynamic material scanning is applied. This is particularly helpful in those cases where the residual wall thickness of corroded materials needs to be measured fast and accurately.
Memory and statistics evaluation
Readings and instrument configuration may be stored conveniently in files and transferred to a computer. The statistics evaluation provides minimum and maximum values, mean and standard deviation.
Plain text menu: Selectable from many languages
The user-friendly, multi-lingual menu guidance in plain text ensures optimum measurement selection, as easy as pie.
New: Also available as a multichannel rack version!
For automated, multichannel operation with ample control features the A-Scan ECHOMETER 1077 is available as a module for mounting into a 19″ rack. More information can be found in the leaflet
Selection table
If you are uncertain about what type of gauge to take: The following table assists you with the selection of the most suitable gauge version for your application.
Rating symbols:  less suited,
  suited,
 well suited,

 optimally suited.
| ECHOMETER 1077 Data 1077.020 |
Application | ECHOMETER 1077 Data LF 1077.998 |
|---|---|---|
 
|
plastics < 10 mm, contact probe |  |
  
|
steel < 10 mm, contact probe |  |
  
|
probe > 4 MHz |   |
 
|
probe < 4 MHz |    |

|
high-damping materials |   |
For more information visit Karl Deutsch website.
Jus taip pat gali dominti
Karl Deutsch Wall Thickness Gauge Echometer 1076 TC
Our top gauge from the 1076 family provides the extended…
IšsamiauKarl Deutsch Wall Thickness Gauge Echometer 1076 Data
2 in 1 plus: The new ECHOMETER 1076 Data High…
IšsamiauKarl Deutsch Wall Thickness Gauge Echometer 1076 Basic
High quality standards, simple operation and an outstanding cost-performance ratio…
IšsamiauKarl Deutsch Ultrasonic Flaw Detector, Echograph 1095
The New Generation of Manual Ultrasonic Testing High-tech meets comfort:…
IšsamiauKarl Deutsch Echometer 1076 K Concentration measurement of liquids
Special probe for liquids By means of a special probe…
Išsamiau
