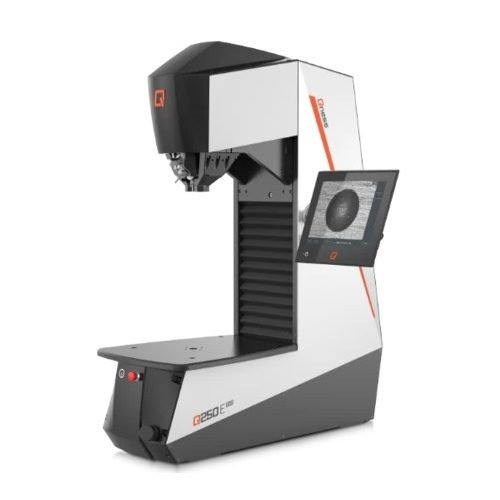
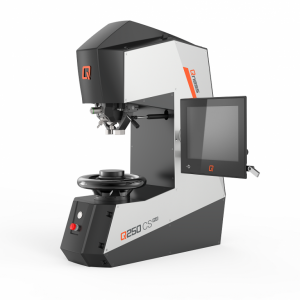
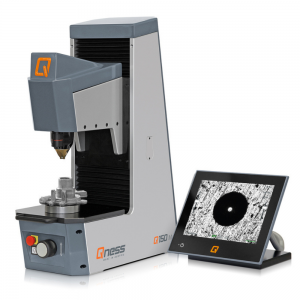
QATM hardness tester Version E EVO: All work piece sizes and large clamping forces
Test Force Range
Q250 E
![]()
Q750 E
Q3000 E
![]()
A hardness tester for all purposes: no matter if operated in a laboratory or in a rough production environment.
The fixed component support and extra-large test table area allow hardness testing of even the largest components.
In the “E” version, the test head is conveniently and dynamically controlled by the integrated asynchronous motor. Test pieces of virtually any size, weighing up to 3500 kg, are securely clamped in the device. The maximum test height is 510 mm.
8-position tool changer
The easy way to serve universal applications: The sophisticated tool-changer concept with a rotational axis angle of 15° provides space for 8 tools in a uniquely compact unit. Downholder elements with a closed shape on three sides guarantee secure workpiece clamping around the test point – even for small test pieces.
Unique instrument features
Dynamic height adjustment
The dynamic height adjustment enables comfortable positioning control via potentiometer (8 mm/s). Using the 2-hand-safety device allows a moving speed of up to 17 mm/s (included with E variant).
Workpiece recognition
Workpiece recognition with motorized height adjustment facilitates a high test head movement speed of 17 mm/s. Sensor technology enables the workpiece to be recognized and the bracing speed to be reduced accordingly to protect the device and workpiece.
Maximum clamping safety
High-performance induction motor in the E version facilitates a workpiece clamping force of up to 3500 kg. Clamping power is adapted to the test method and is automatically set to be greater than the test force. Operators do not need to set levels and can rely on the device to guarantee safe, optimized adaption.
Swivel-action machine table
Unique operating convenience for large, awkwardly-shaped molded and formed components and workpieces. The work table, optional with the M and E versions, can be tilted up to 5° – including built-in grips – no extra workpiece clamping necessary!
Swiveling downholder
No long tool changeovers for inaccessible test positions. The downholder can be swivelled in and out via manual or motorized action, as required. Furthermore, the clamping elements can be changed easily and adapted to suit the customer‘s component.
Enlarged test height
If the 510mm height of the test room is still not enough for especially large, bulky or difficult-to-clamp items, on request QATM can provide an even taller machine frame. The robust steel frame can be produced in customized dimensions.
Highly accurate results in ultra-short time
Excellent image quality
The optics system of the new EVO series has been completely redeveloped. It was built on site in the cleanroom at the QATM plant and benefits from the company’s comprehensive expertise. All the new devices share one universal microscope system covering all the necessary visual ranges between 0.1 mm and 8 mm in maximum clarity and contrast. The QATM system guarantees uniform illumination across the entire image, regardless of the degree of magnification, and without dark edges.
Reduced cycle times
The new EVO product line guarantees optimized test parameters, a faster Windows10 PC, much shorter serial autofocus times, significantly faster regulation of brightness and image evaluation, all of which contributes to far more rapid cycle completion times in everyday hardness testing – with even quieter operating noises.
XLED Brinell evaluation lenses
XLED illumination modules revolutionize the analysis of Brinell indentations. Due to beading on commercially available lenses, soft Brinell indentations in particular can be subject to imprecise gauging results. In contrast, XLED lenses guarantee precise and repeatable measurements, regardless of material type and hardness, due to direct and wide-extension illumination.
Unlimited suitability for industrial applications
Ethernet industrial cameras
High-quality CMOS 5-megapixel cameras with Ethernet data transfer define the current industrial standard. Unlike other camera systems, a far higher transmission stability is possible here. Additionally, the PC and hardness testing device can be set up remotely at great distances from each other. This is ideal in manufacturing environments in which the control infrastructure is installed in external switch cabinets.
Freely adjustable operating display
The 12” ultra-flat, capacitive touch display can be raised, lowered and tilted smoothly via ball-and-socket joints for ergonomically optimized use.
Optimized test head design
A range of clamping and holding elements can be configured to suit tooling requirements. The optional transparent collision guard can protect tools on the device from damage while ensuring an unrestricted view of the test cell interior.
A new dimension of efficient operation
Multi-touch capacity & full screen mode
- Modern multi-touch operation for simple zooming and easy menu navigation.
- A clear overview of all the most important functions on one screen guarantees user-friendliness and, most importantly, ensures test results are clearly prioritized.
Data administration
- Numerous statistical functions: Bar graphs, line graphs, histogrammes
- Export test results as XML or CSV file
- Detailed normed information on each indentation
- Test report as Excel, Word, PDF or direct print
- Automatic export and deleting functions for serial operation
Software QPIX T2
- Simple operation
- Fully automatic image analysis via ring light in light or dark field process
- 4 zoom steps as standard reduces lense changeovers
- Rapid auto-focus
- Manual follow-up measurement possible
More Information about the Qpix T2 Software on Qness WEB page
Technical Data
QNESS E VERSION – 250 E / 750 E / 3000 E
|
Test force range |
Qness 250 E EVO: 1 – 250 kg (9.81 – 2450 N) |
|
Height adjustment |
electrical / asynchron motor |
|
Test height / Throat depth |
510 mm / 320 mm |
|
Test anvil |
584 x 450 mm |
|
Max. work piece weight |
“unlimited” |
|
Weight of basic machine |
500 kg |
|
Test sequence |
fully automatic / electronic force control |
|
Camera system / Image transfer |
5 MP Ethernet Industrial standard / up to 270FPS |
|
Tool positions |
2 (Standard) oder 8 (Tool Changer) |
|
Software |
Qpix T2 (Option: Qpix CONTROL 2 M) |
|
Operating system / Hard disk |
Windows 10 IoT / 128 GB SSD |
|
Data interfaces |
1x USB (Front) 4x USB, 2x RJ45 (Ethernet), 1x DisplayPort, 1x RS232, 1x HDMI |
|
Lenses |
XLED 1, XLED 2, XLED 5, 5x, 10x, 20x, 50x, 100x |
|
Fields of view (depending on tool selection) |
0.113x 0.084 mm (100x) up to 7.98 x 5.97 mm (XLED 1) |
|
Display |
Capacitive 12“ Touch – Display |
|
Power supply |
230~1/N/PE, 110~1/N/PE |
|
Max. power consumption |
~ 480 W |
|
Additional options |
Qness designer pedestal, collision protection, cross laser, test anvils, prisms, data connections, barcode/QR code reader etc. |
You might also be interested in
QATM Model CHD Master+ : multiple sample, mapping, welding samples
Test Methods and Force Application Q10 CHD Master+ Q30…
MoreQATM Model CHD Master – Fully Automatic, Economically, Up-To-Date
Test Methods and Force Application Q10 CHD Master Q30…
MoreQATM 60 A/A+ EVO, Micro Hardness Tester
The Brinell / Knoop / Vickers hardness tester series Qness…
MoreQATM hardness tester Version M EVO: Ideal for large samples
The fixed component support and the extra-large test table area…
MoreQATM hardness tester CS/C EVO: Ideal for small samples
The characteristic “C” shaped machine frame gives the CS and…
MoreQATM Rockwell hardness tester 150 RCS
Features Extremely fast hardness testing cycle – under 3 seconds…
MoreQATM Rockwell hardness tester 150 CS ECO
QATM configures the Rockwell hardness tester Qness 150 CS ECO…
MoreQATM Rockwell hardness tester 150 A/A+
1. Pipe testing Check pipes economically with the Rockwell hardness…
MoreQATM Rockwell hardness tester 150 R
1. on 10,1″ Touch-Screen Most simple operation High-quality and sturdy aluminium…
MoreQATM Rockwell hardness tester 150 M
1. on 12″ Touch-Display Evaluation and data management High-quality and sturdy…
More
